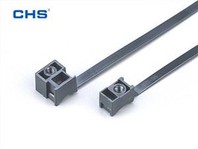
As a professional cable clips supplier, I am often asked about the installation process for cable clips with screws. In this blog post, I will guide you through the step-by-step process, ensuring that you can install cable clips with screws efficiently and effectively.


Understanding Cable Clips with Screws
Before we delve into the installation process, let's first understand what cable clips with screws are and their types. Cable clips with screws are essential components used to secure cables in place, preventing them from tangling, moving, or getting damaged. They come in various shapes and sizes to accommodate different cable types and installation environments.
- Flat Cable Clip: Ideal for flat cables, such as ribbon cables. You can find a wide range of Flat Cable Clip on our website.
- Circle Cable Clips: Designed to hold round cables securely. Check out our Circle Cable Clips for your round cable management needs.
- K Type Cable Clips: These clips are suitable for specific cable configurations and offer excellent stability. Explore our K Type Cable Clips for unique cable management solutions.
Tools Required for Installation
To install cable clips with screws, you will need the following tools:
- Screwdriver: A Phillips or flathead screwdriver, depending on the type of screws used in the cable clips.
- Measuring Tape: To measure the distance between cable clips and ensure proper spacing.
- Drill (Optional): If you are installing the cable clips on a hard surface, such as wood or metal, a drill may be required to create pilot holes for the screws.
- Pencil: To mark the installation points on the surface.
Step-by-Step Installation Process
Step 1: Plan the Installation
- Identify the Cable Route: Determine the path where you want to install the cable clips. Consider factors such as cable length, bends, and access points.
- Measure the Spacing: Decide on the spacing between the cable clips based on the cable type and the load it will carry. Generally, a spacing of 12 to 18 inches is recommended for most applications.
- Mark the Installation Points: Use a pencil to mark the exact locations where the cable clips will be installed along the cable route.
Step 2: Prepare the Surface
- Clean the Surface: Ensure that the surface where the cable clips will be installed is clean and free of dust, debris, and grease. This will help the cable clips adhere better to the surface.
- Create Pilot Holes (if necessary): If you are installing the cable clips on a hard surface, use a drill to create pilot holes at the marked installation points. The size of the pilot holes should be slightly smaller than the diameter of the screws.
Step 3: Install the Cable Clips
- Position the Cable Clip: Place the cable clip over the marked installation point, aligning the screw holes with the pilot holes (if any).
- Insert the Screws: Insert the screws through the holes in the cable clip and into the surface. Use a screwdriver to tighten the screws firmly, but be careful not to overtighten them, as this may damage the surface or the cable clip.
- Repeat the Process: Install the remaining cable clips at the marked intervals along the cable route, following the same procedure.
Step 4: Secure the Cables
- Place the Cables in the Clips: Once all the cable clips are installed, carefully place the cables into the cable clips. Make sure that the cables are properly seated in the clips and that there is no tension or strain on the cables.
- Adjust the Cables: If necessary, adjust the position of the cables in the clips to ensure that they are straight and evenly spaced.
Tips for a Successful Installation
- Choose the Right Cable Clips: Select cable clips that are suitable for the type and size of the cables you are using. Consider factors such as the material, load capacity, and environmental conditions.
- Use the Correct Screws: Make sure to use the screws that are recommended for the cable clips. Using the wrong type of screws may result in a loose or insecure installation.
- Follow the Manufacturer's Instructions: Always refer to the manufacturer's instructions for specific installation guidelines and recommendations.
- Test the Installation: After installing the cable clips and securing the cables, give the cables a gentle tug to ensure that they are firmly held in place. If any of the cable clips are loose, tighten the screws or reposition the clips as needed.
Conclusion
Installing cable clips with screws is a relatively simple process that can be completed by anyone with basic DIY skills. By following the steps outlined in this blog post and using the right tools and materials, you can ensure a secure and professional-looking cable management system.
If you have any questions or need further assistance with cable clip installation or if you are interested in purchasing high-quality cable clips, please feel free to contact us. We are a leading cable clips supplier, offering a wide range of cable clips to meet your specific needs. Let's discuss your requirements and find the best cable management solutions for you.
References
- "Cable Management Handbook" - A comprehensive guide to cable management techniques and best practices.
- Manufacturer's instructions for cable clips with screws.